Managing consent across multiple platforms is a common challenge for businesses—but it doesn’t have to be. With iubenda’s 2-Way Sync, part of the Consent Database, you can keep consent statuses updated in real time across all your third-party tools. This feature helps you stay compliant, improve accuracy, and streamline the process of managing user preferences.
This guide will show you how to set up 2-Way Sync using iubenda’s Consent Database with tools like Zapier, Make, and N8N. You’ll also learn how to handle common issues like retries and failed attempts, all in a simple, easy-to-follow structure.
Jump to:
💡 What Is 2-Way Sync with Webhooks?
2-Way Sync ensures that consent preferences collected via iubenda are automatically updated in connected third-party tools. Similarly, changes made in those tools can be reflected back in iubenda’s Consent Database, keeping everything synchronized and compliant.
With webhooks, the process becomes seamless:
- Real-time updates: Trigger actions the moment a consent preference changes.
- Bidirectional data flow: Keep consent statuses consistent across tools like HubSpot, Mailchimp, and more.
How to Integrate an Outbound Webhook with Zapier
1. Create a Zap:
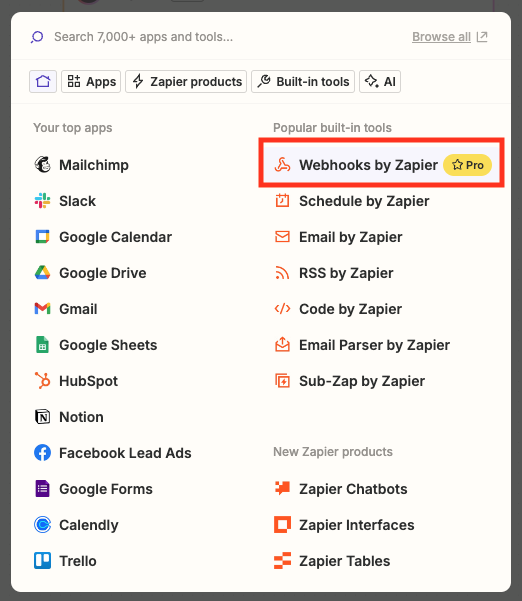
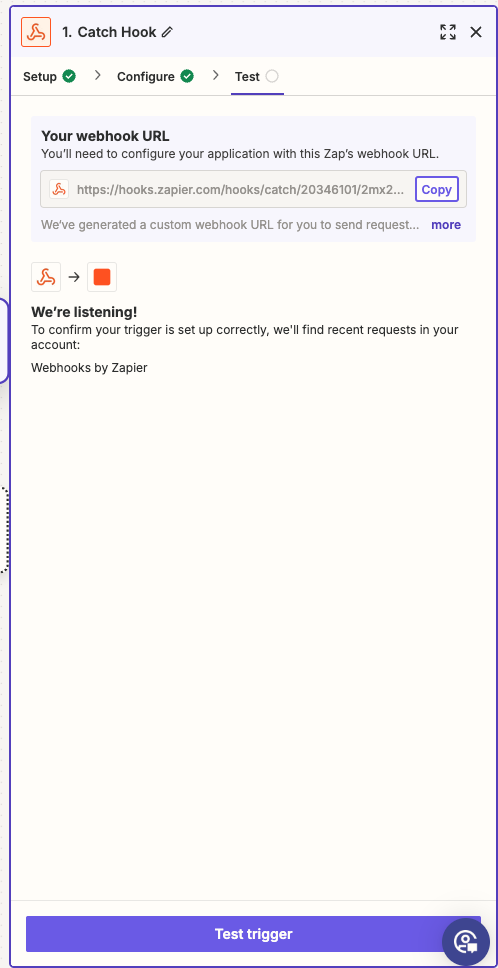
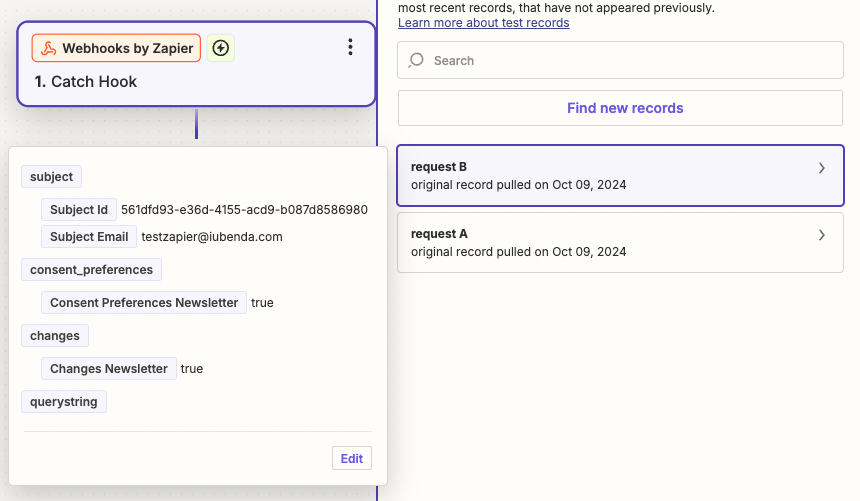
- Log into Zapier, create a new Zap, and select Webhooks by Zapier as the app.
- Choose Catch Hook as the trigger event and copy the webhook URL Zapier provides.
2. Set Up the Webhook in iubenda:
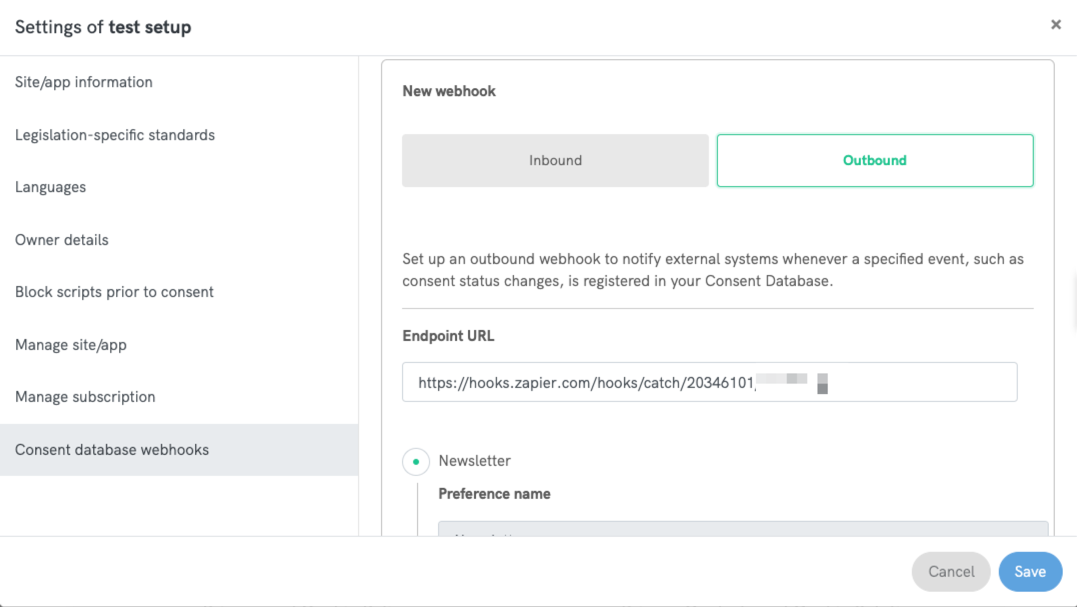
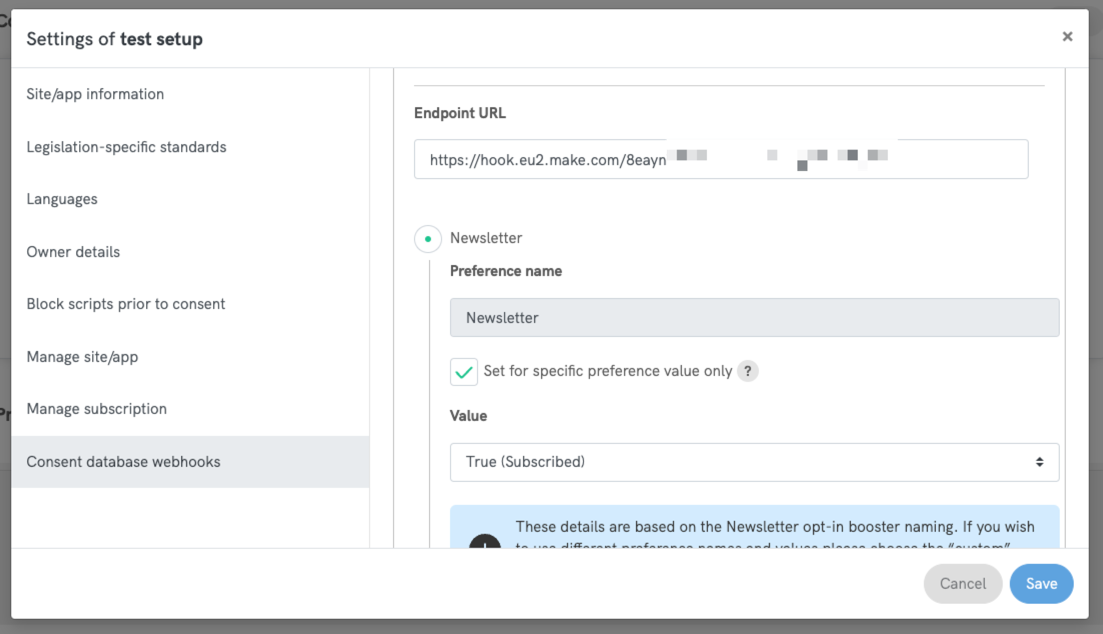
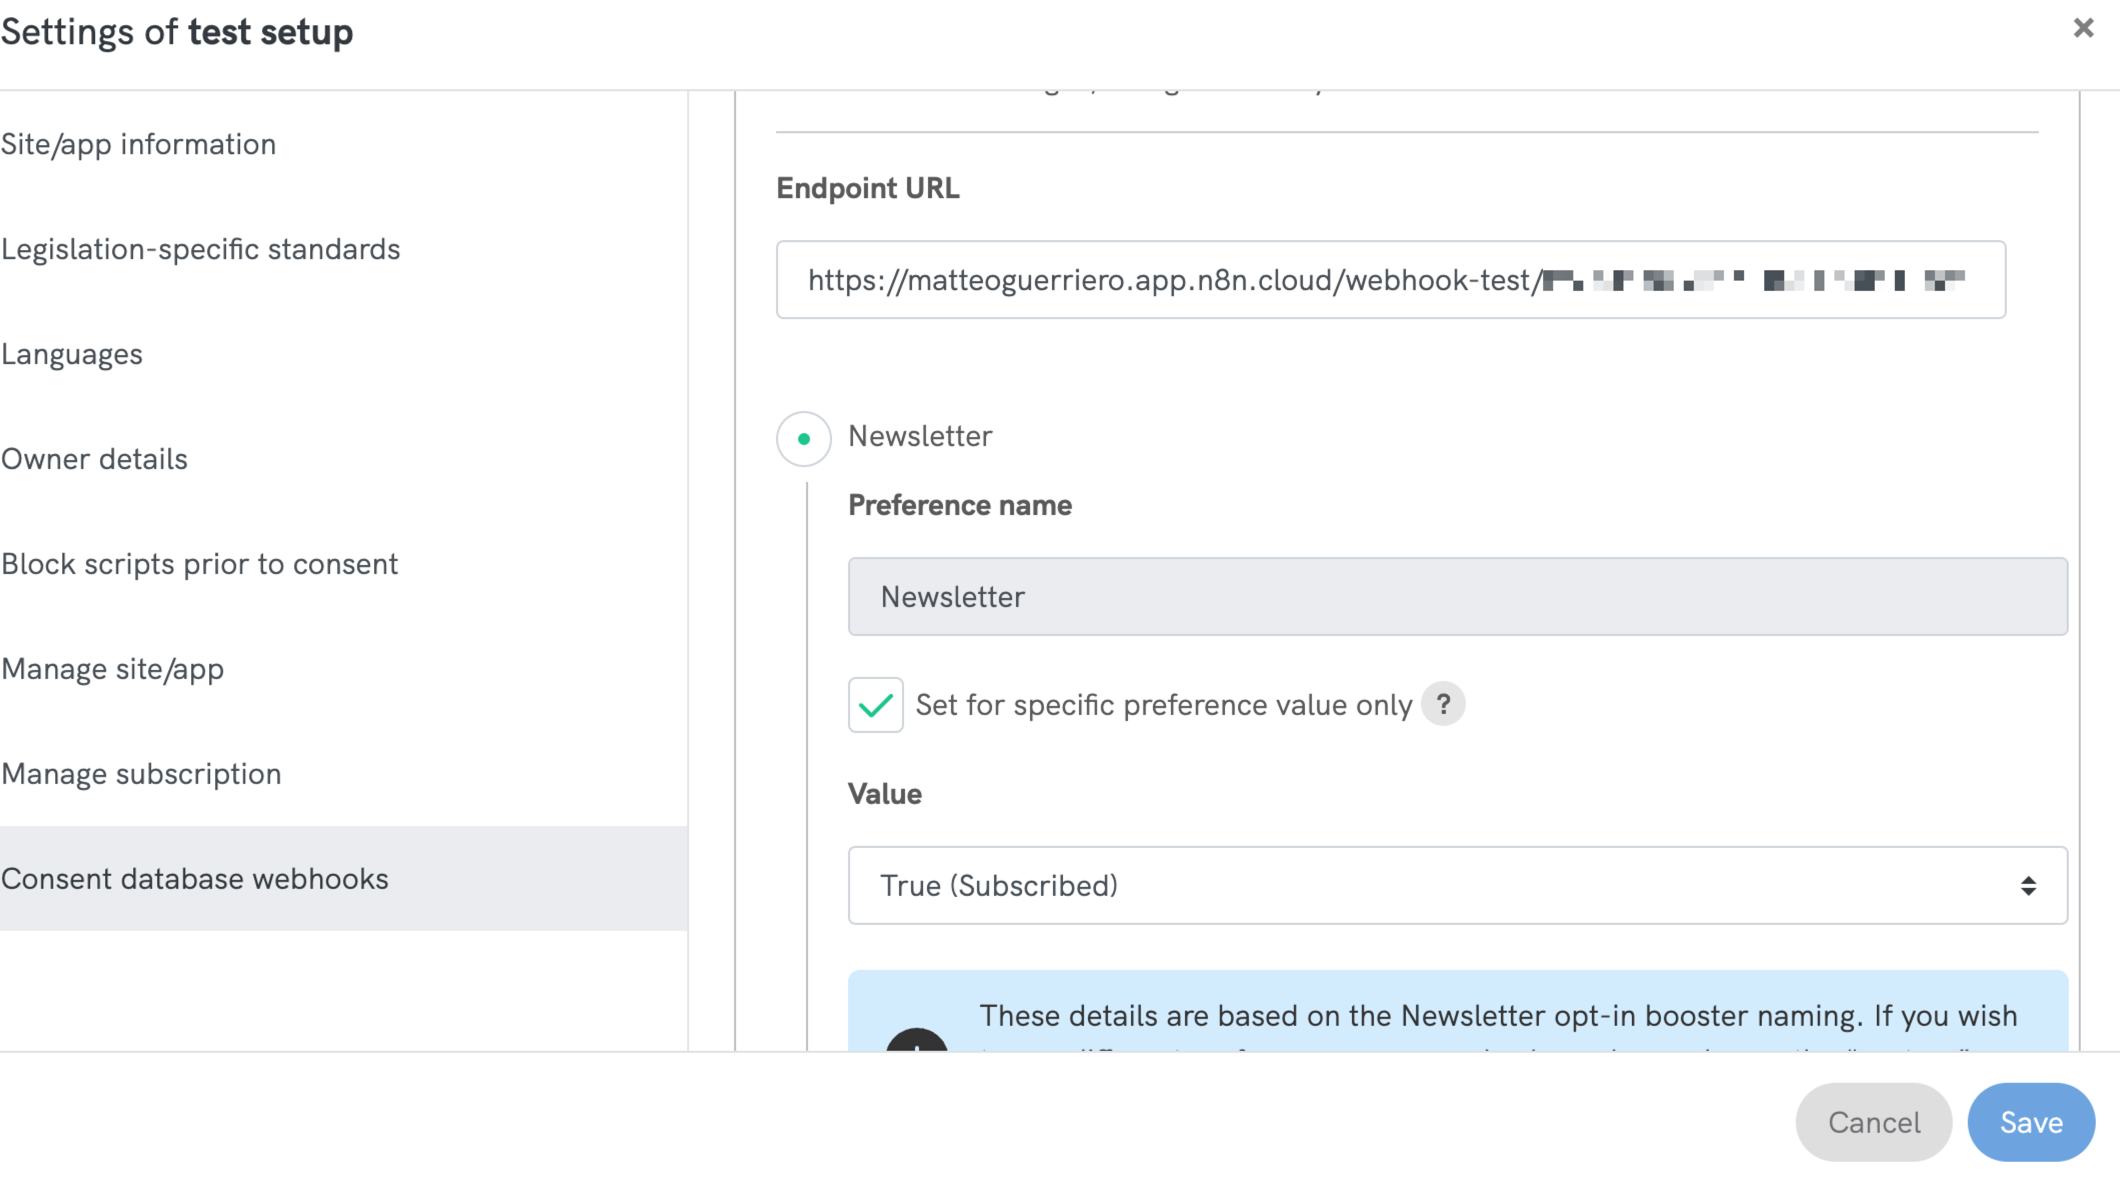
- In iubenda, go to the Consent Database Webhooks section. (From the iubenda Dashboard, select the project and click the settings icon, Open Consent Database Webhooks: In the side menu, click on “Consent database webhooks“)
- Create a new Outbound webhook, paste the Zapier-provided URL, and select the preference you want to sync (e.g., newsletter subscription).
- Save the webhook.
If you don’t know how to access the webhooks section, check here ⬇️
3. Test and Publish:
- Trigger an event in iubenda (e.g., a subscription update).
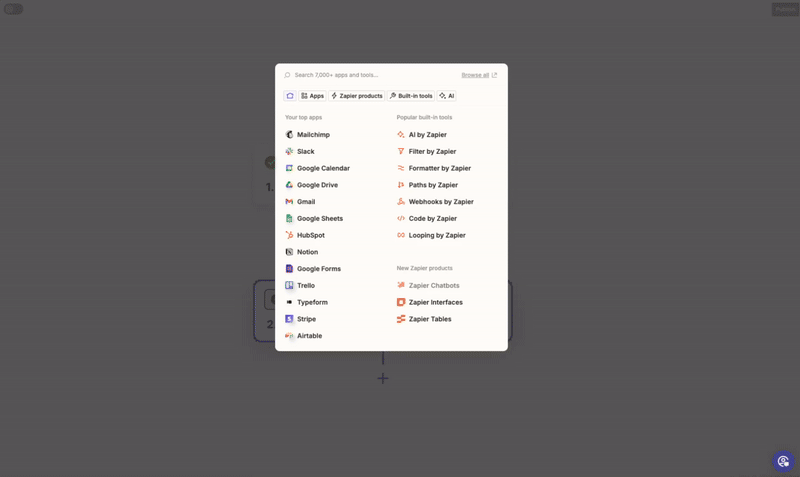
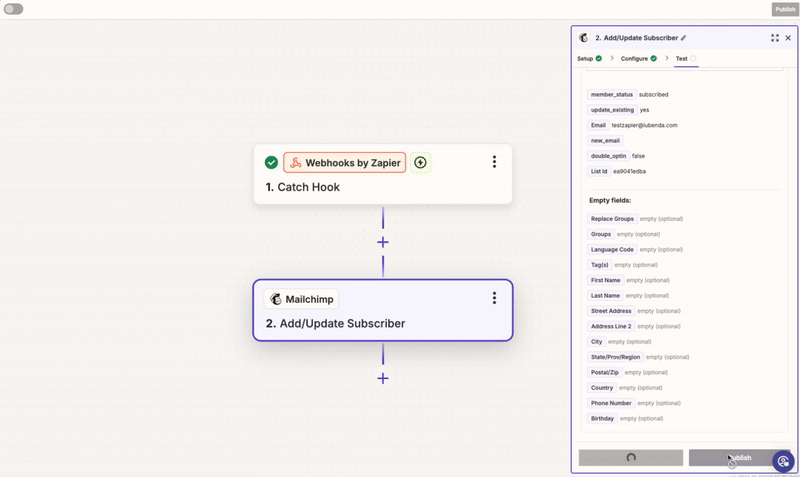
- Test the webhook in Zapier and connect it to the third-party service you want to sync (e.g., Mailchimp).
- [Optional] Define Filters or Paths:
- If sending multiple values via webhooks (e.g., all newsletter preferences), set up filters or paths in Zapier to only proceed with specific values, such as only when the preference is set to “true”.
- Add the service you want to connect (e.g., Mailchimp) and specify the changes you want to apply, such as updating the subscriber’s status based on the email field in the webhook.
- Once everything works, publish the Zap.
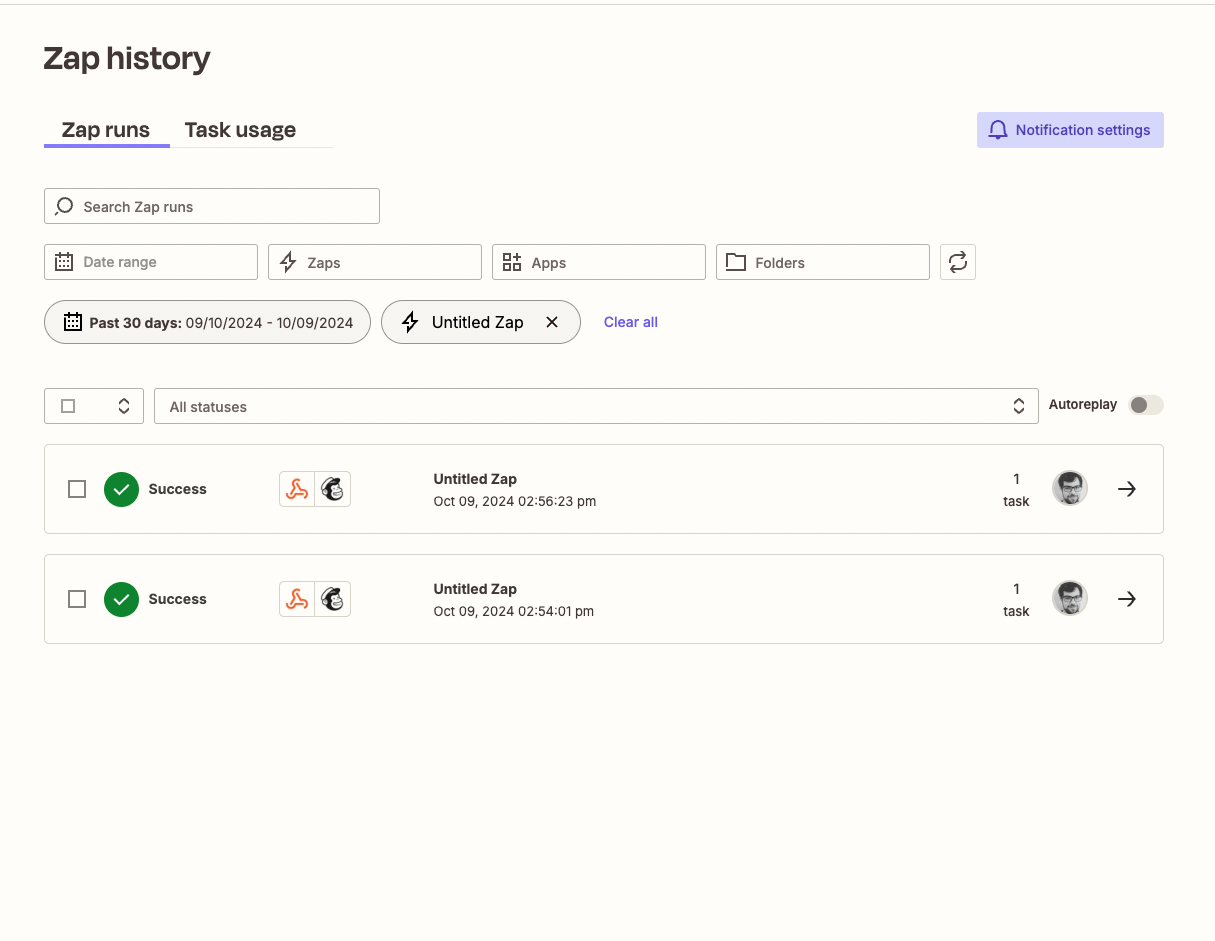
💡 Tip: Use Zap history to make sure everything is running smoothly.
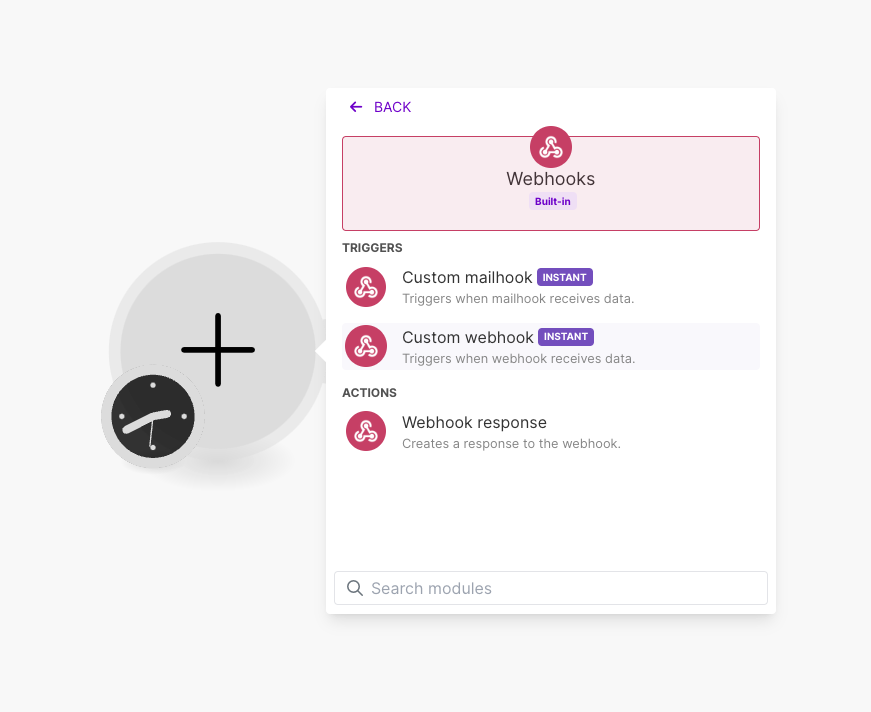
How to Integrate an Outbound Webhook with Make
1. Create a Scenario:
- Log into Make and create a new scenario.
- Select Webhooks, choose Custom webhook, and copy the provided URL.
2. Set Up the Webhook in iubenda:
- In iubenda, go to the Consent Database Webhooks section. (From the iubenda Dashboard, select the project and click the settings icon, Open Consent Database Webhooks: In the side menu, click on “Consent database webhooks“)
- Create a new Outbound webhook, paste the Make URL, and select the preference you want to track (e.g., newsletter updates).
- Save the webhook.
If you don’t know how to access the webhooks section, check here ⬇️
3. Run and Automate:
- In Make, click Redetermine data structure and trigger an event in iubenda (e.g., a newsletter subscription update).
- Let Make detect the data structure and connect the webhook to a third-party tool (e.g., HubSpot).
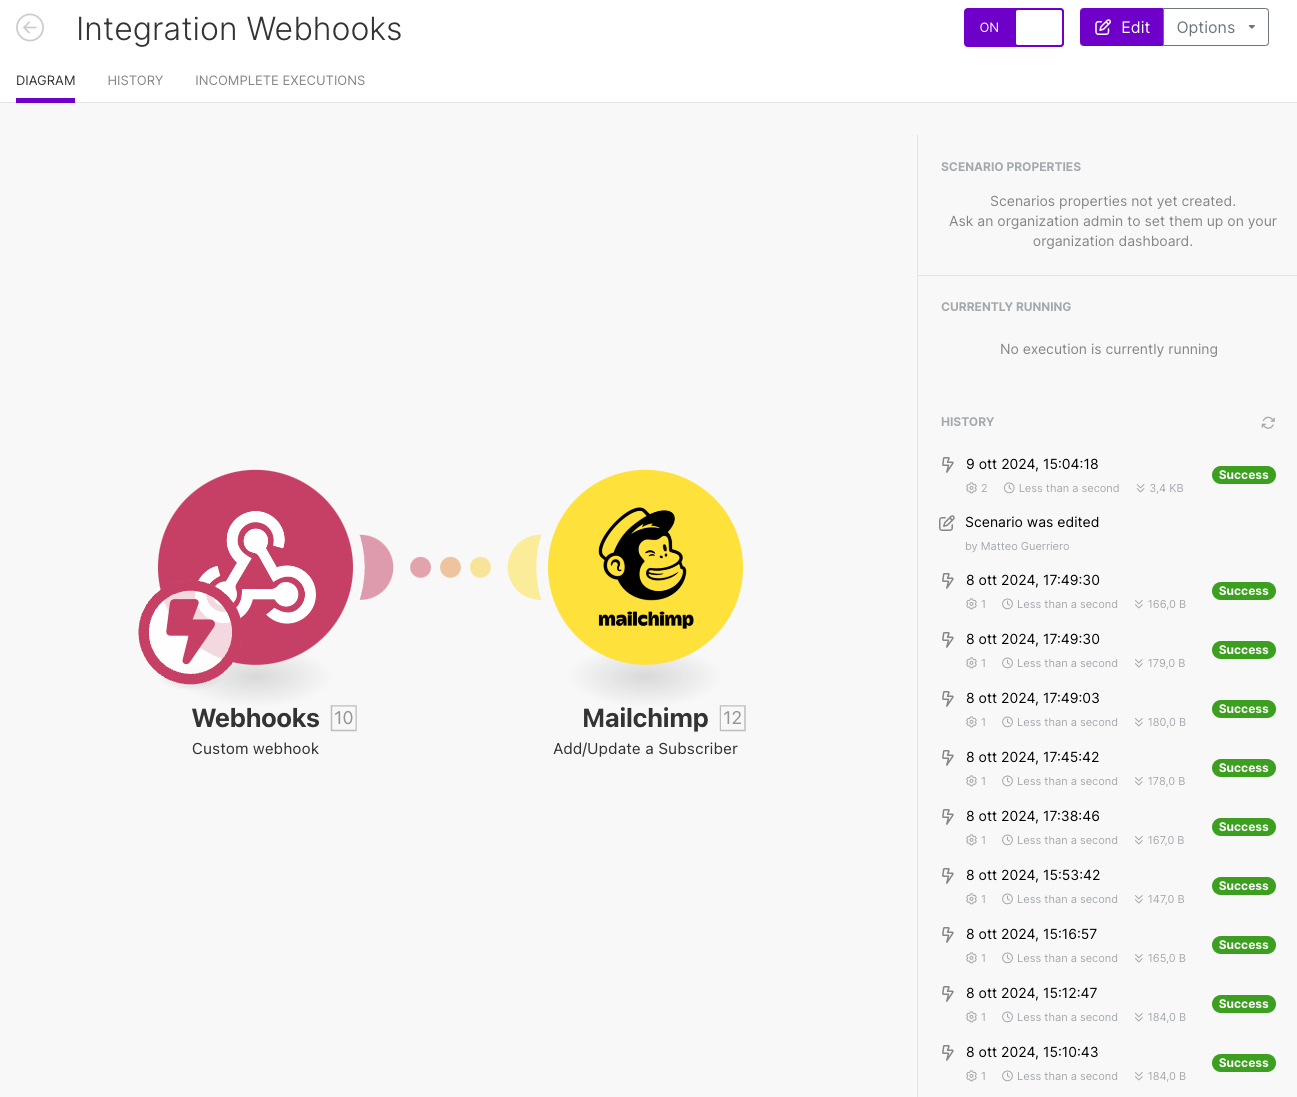
- You can now link the webhook to a service like Mailchimp or HubSpot and apply the updates, such as managing subscribers based on their email.
- Once confirmed, the system will run automatically.
- [Optional] Add Filters:
- If you send multiple values, set filters in Make to trigger only when specific values are sent.

💡 Tip: Check the Make dashboard to monitor the integration.
How to Integrate an Outbound Webhook with N8N
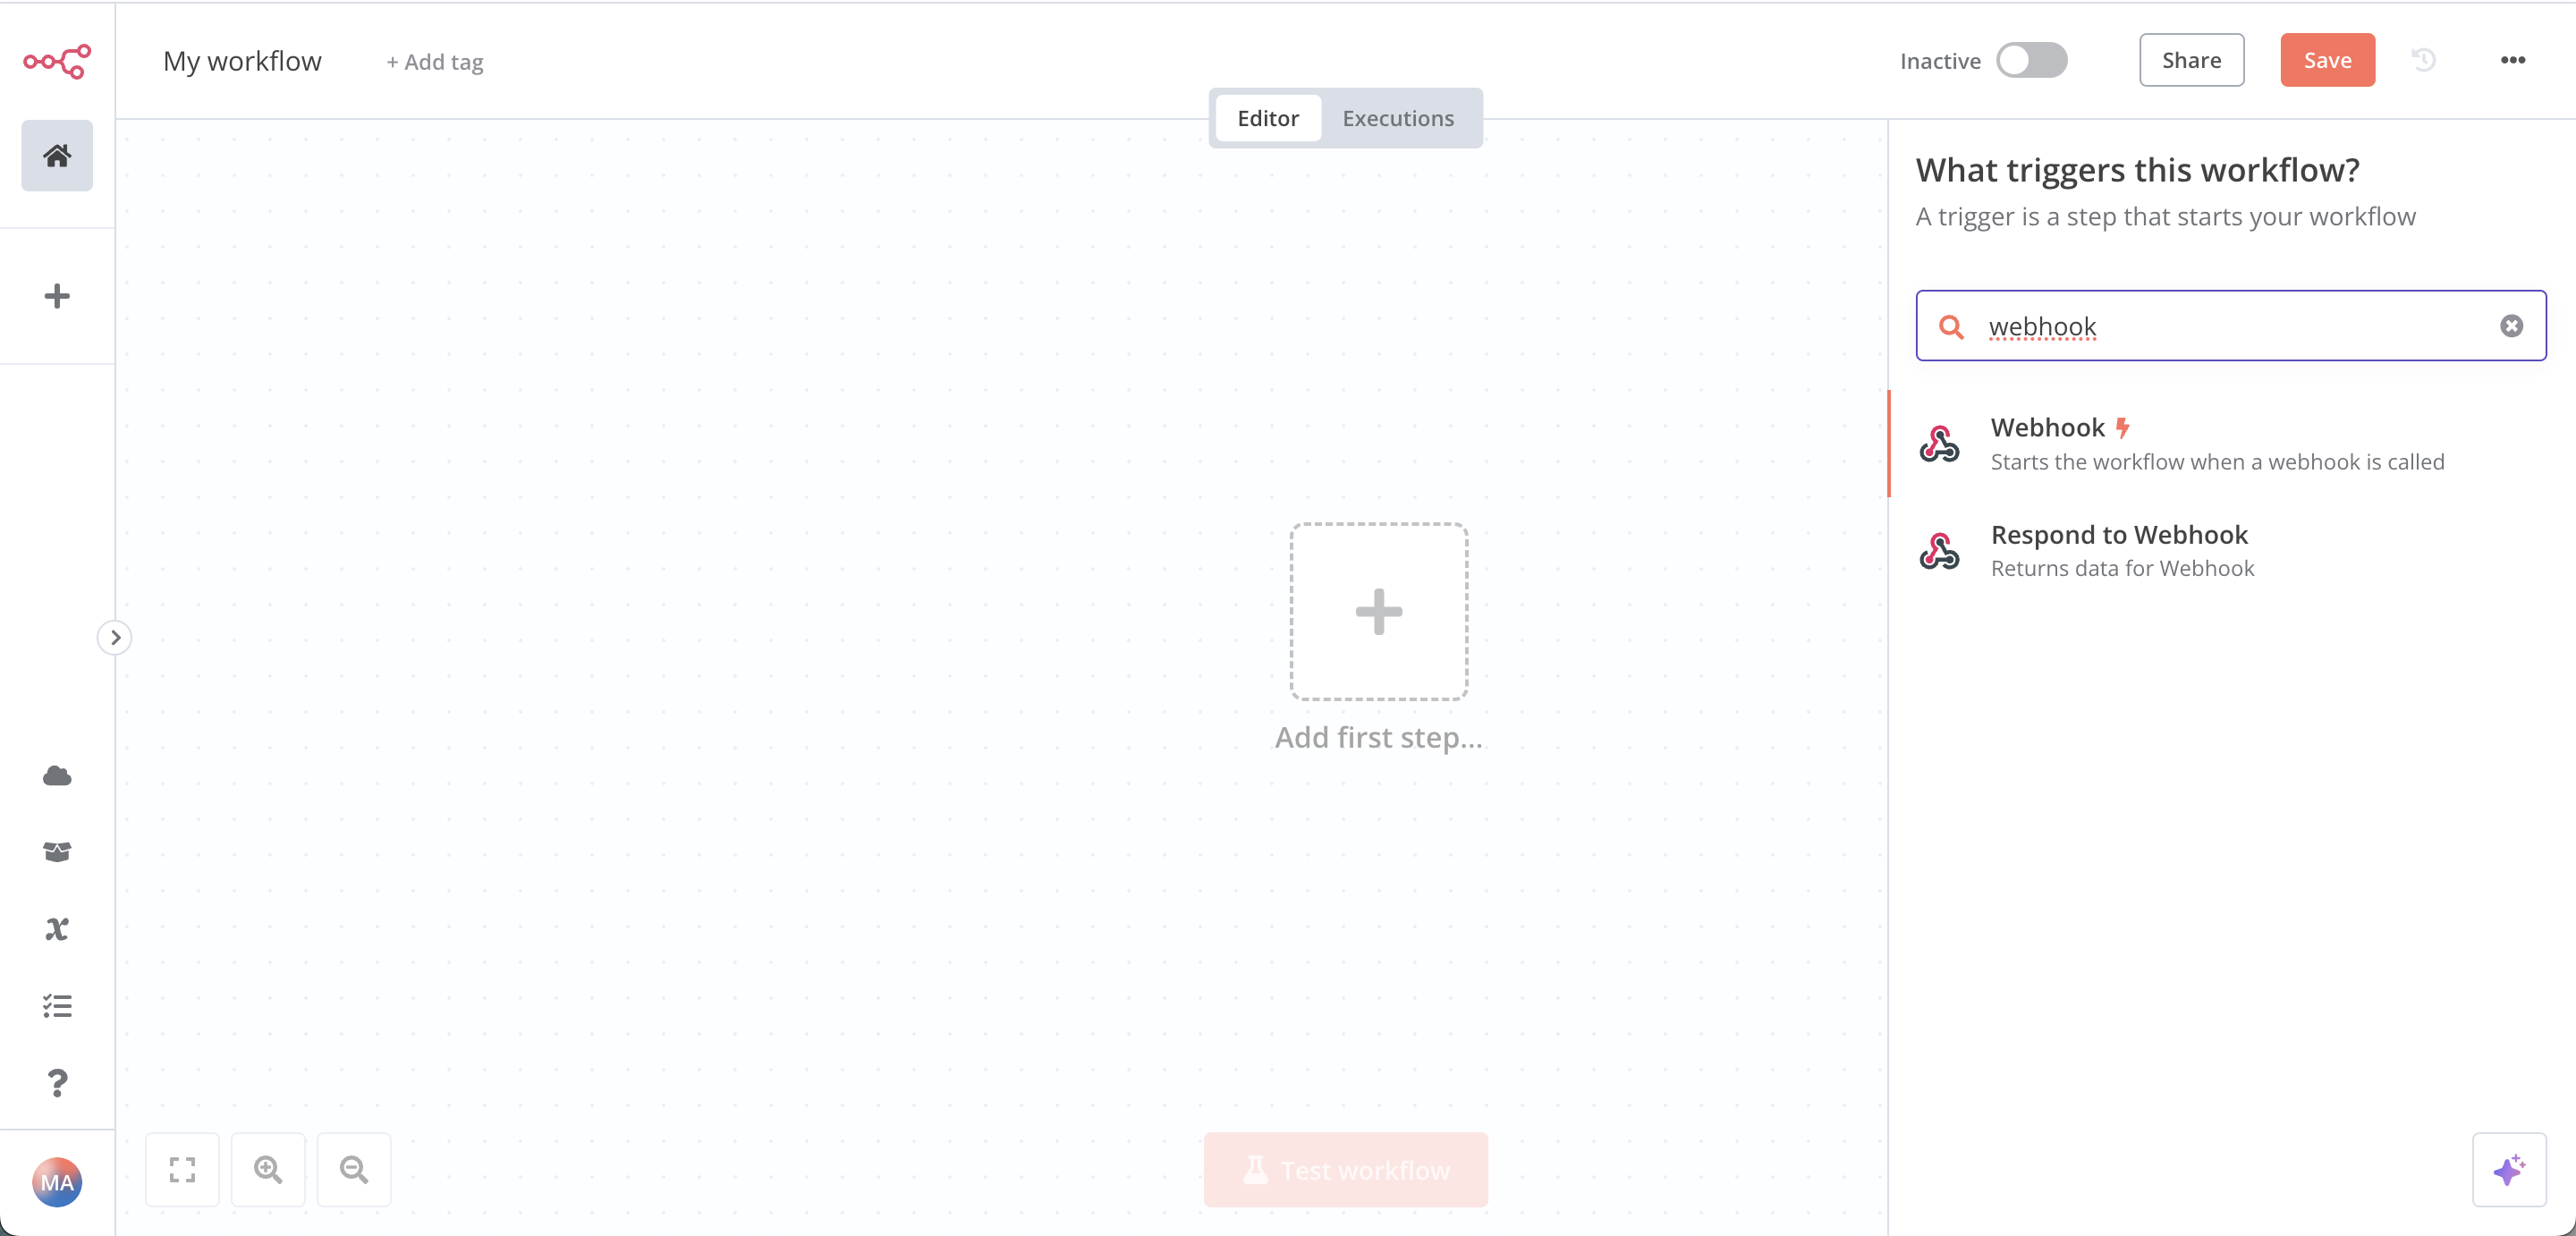
1. Create a Workflow:
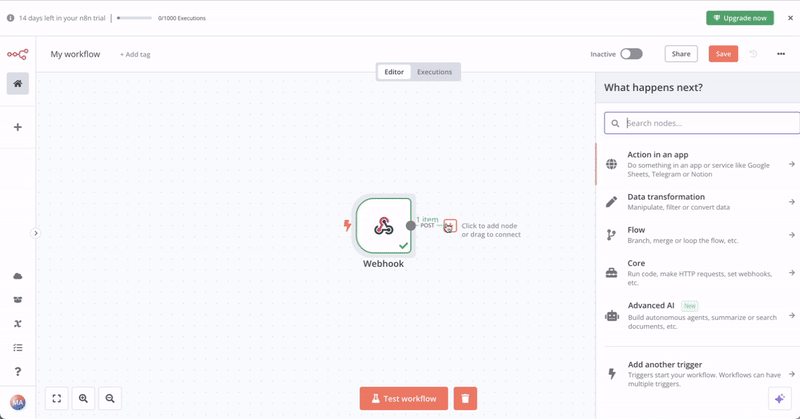
- Open N8N and create a new workflow.
- Add a Webhook node, set the method to POST, and copy the webhook URL.
2. Set Up the Webhook in iubenda:
- In iubenda, go to the Consent Database Webhooks section. (From the iubenda Dashboard, select the project and click the settings icon, Open Consent Database Webhooks: In the side menu, click on “Consent database webhooks“)
- Create a new Outbound webhook, paste the N8N URL, and select the preference you want to track.
- Save the webhook.
If you don’t know how to access the webhooks section, check here ⬇️
3. Test and Go Live:
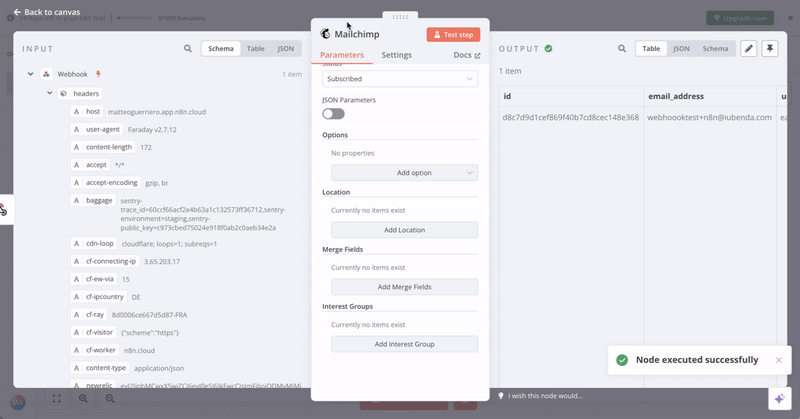
- In N8N, listen for the test event (e.g., a subscription update), and let N8N confirm the data structure.
- [Optional] Add Filters or Paths:
- If sending multiple values, you can set up filters to only process certain values or create different paths for various outcomes.
- Now, connect the webhook to an app like Mailchimp and apply any changes, such as creating a new contact.
- Save your workflow and activate it. From now on, every time a subscriber is added to the Consent Database, it will automatically sync with Mailchimp.
💡 Tip: Use the Execution tab in N8N to ensure everything is working properly.
Advanced: What to Do If a Webhook Fails
Sometimes, a webhook may fail due to issues with the destination server. When this happens, iubenda automatically retries the request up to 10 times, following this schedule:
- 2 minutes after the first failure.
- Increasing intervals (5 minutes, 10 minutes, up to 3 hours).
- After 10 failed attempts, the webhook is marked as failed and disabled.
Here’s the retry schedule:
- First attempt: After 2 minutes
- Second attempt: After 5 more minutes
- Third attempt: After 10 more minutes
- Fourth attempt: After 20 more minutes
- Fifth attempt: After 45 more minutes
- Sixth attempt: After 1 hour
- Seventh attempt: After 1.5 hours
- Eighth attempt: After 2 hours
- Ninth attempt: After 2.5 hours
- Tenth attempt: After 3 hours
- After 10 failed attempts, the webhook is marked as failed and will not be retried again.
Circuit Breaker:
If a webhook fails 10 times in a row, it will be automatically disabled. You’ll receive an email, and it will be marked as disabled in your webhook settings.
Webhook Payload Example
Here’s an example of the data iubenda sends in a webhook:
{
"subject": {
"id": "9b05c70c5c78a31aeaf13f8f27c1f890",
"email": "subject@email.com"
},
"consent_preferences": {
"newsletter": "false"
},
"changes": {
"newsletter": "false"
}
}
- subject: The user’s ID and email.
- consent_preferences: The updated consent preferences, like subscribing or unsubscribing from a newsletter.
- changes: Any changes from the previous consent record.