Creating an email marketing campaign from scratch can be overwhelming, especially if your technical skills aren’t the strongest. Mailchimp is a powerful email marketing platform that makes it easy for you to create email marketing campaigns without needing graphic design or technical expertise. In this article, we will explain how to create a Newsletter in Mailchimp step by step.
Let’s dive in!

Before you begin creating a Mailchimp newsletter, you need to decide what type of content you want to promote in your newsletter.
To begin, consider the key objectives of your newsletter – do you want to inform your audience, promote a new product or service, or drive traffic to your website? Once you have a clear idea of your newsletter’s objectives, you can start coming up with content ideas that fit those objectives.
For example, if your company has a blog, it might be a good idea to include the latest articles you’ve published on it, or highlight the most popular ones. If you have an e-commerce shop, you can also use the newsletter as a way to communicate with your audience about promotions and new products.
Here are some questions to consider when picking a topic for your Mailchimp newsletter:
| Brainstorm Step | How to Do It |
|---|---|
| Think About Your Readers | What do they like? What do they want to know? |
| Look at Similar Newsletters | Which topics were popular? Try something similar. |
| Check Current Events | Is there something new that readers might like? |
| Ask for Feedback | Ask some of your readers what they’re interested in. |
| Write Down Ideas | List all your thoughts, even the silly ones. |
👉 For a successful newsletter, always consider your target audience and what kind of content they would find relevant, then merge this with your main objectives.
Overall, taking the time to come up with a theme for your Mailchimp newsletter is an essential first step in creating a successful campaign.
Then this may be useful!
Check 👉 How to set up an unsubscribe link and why you need it for marketing purposes
To create a newsletter in Mailchimp, you’ll need to start by signing up for an account. Luckily, it’s a simple process that only requires an email address and password to get started.
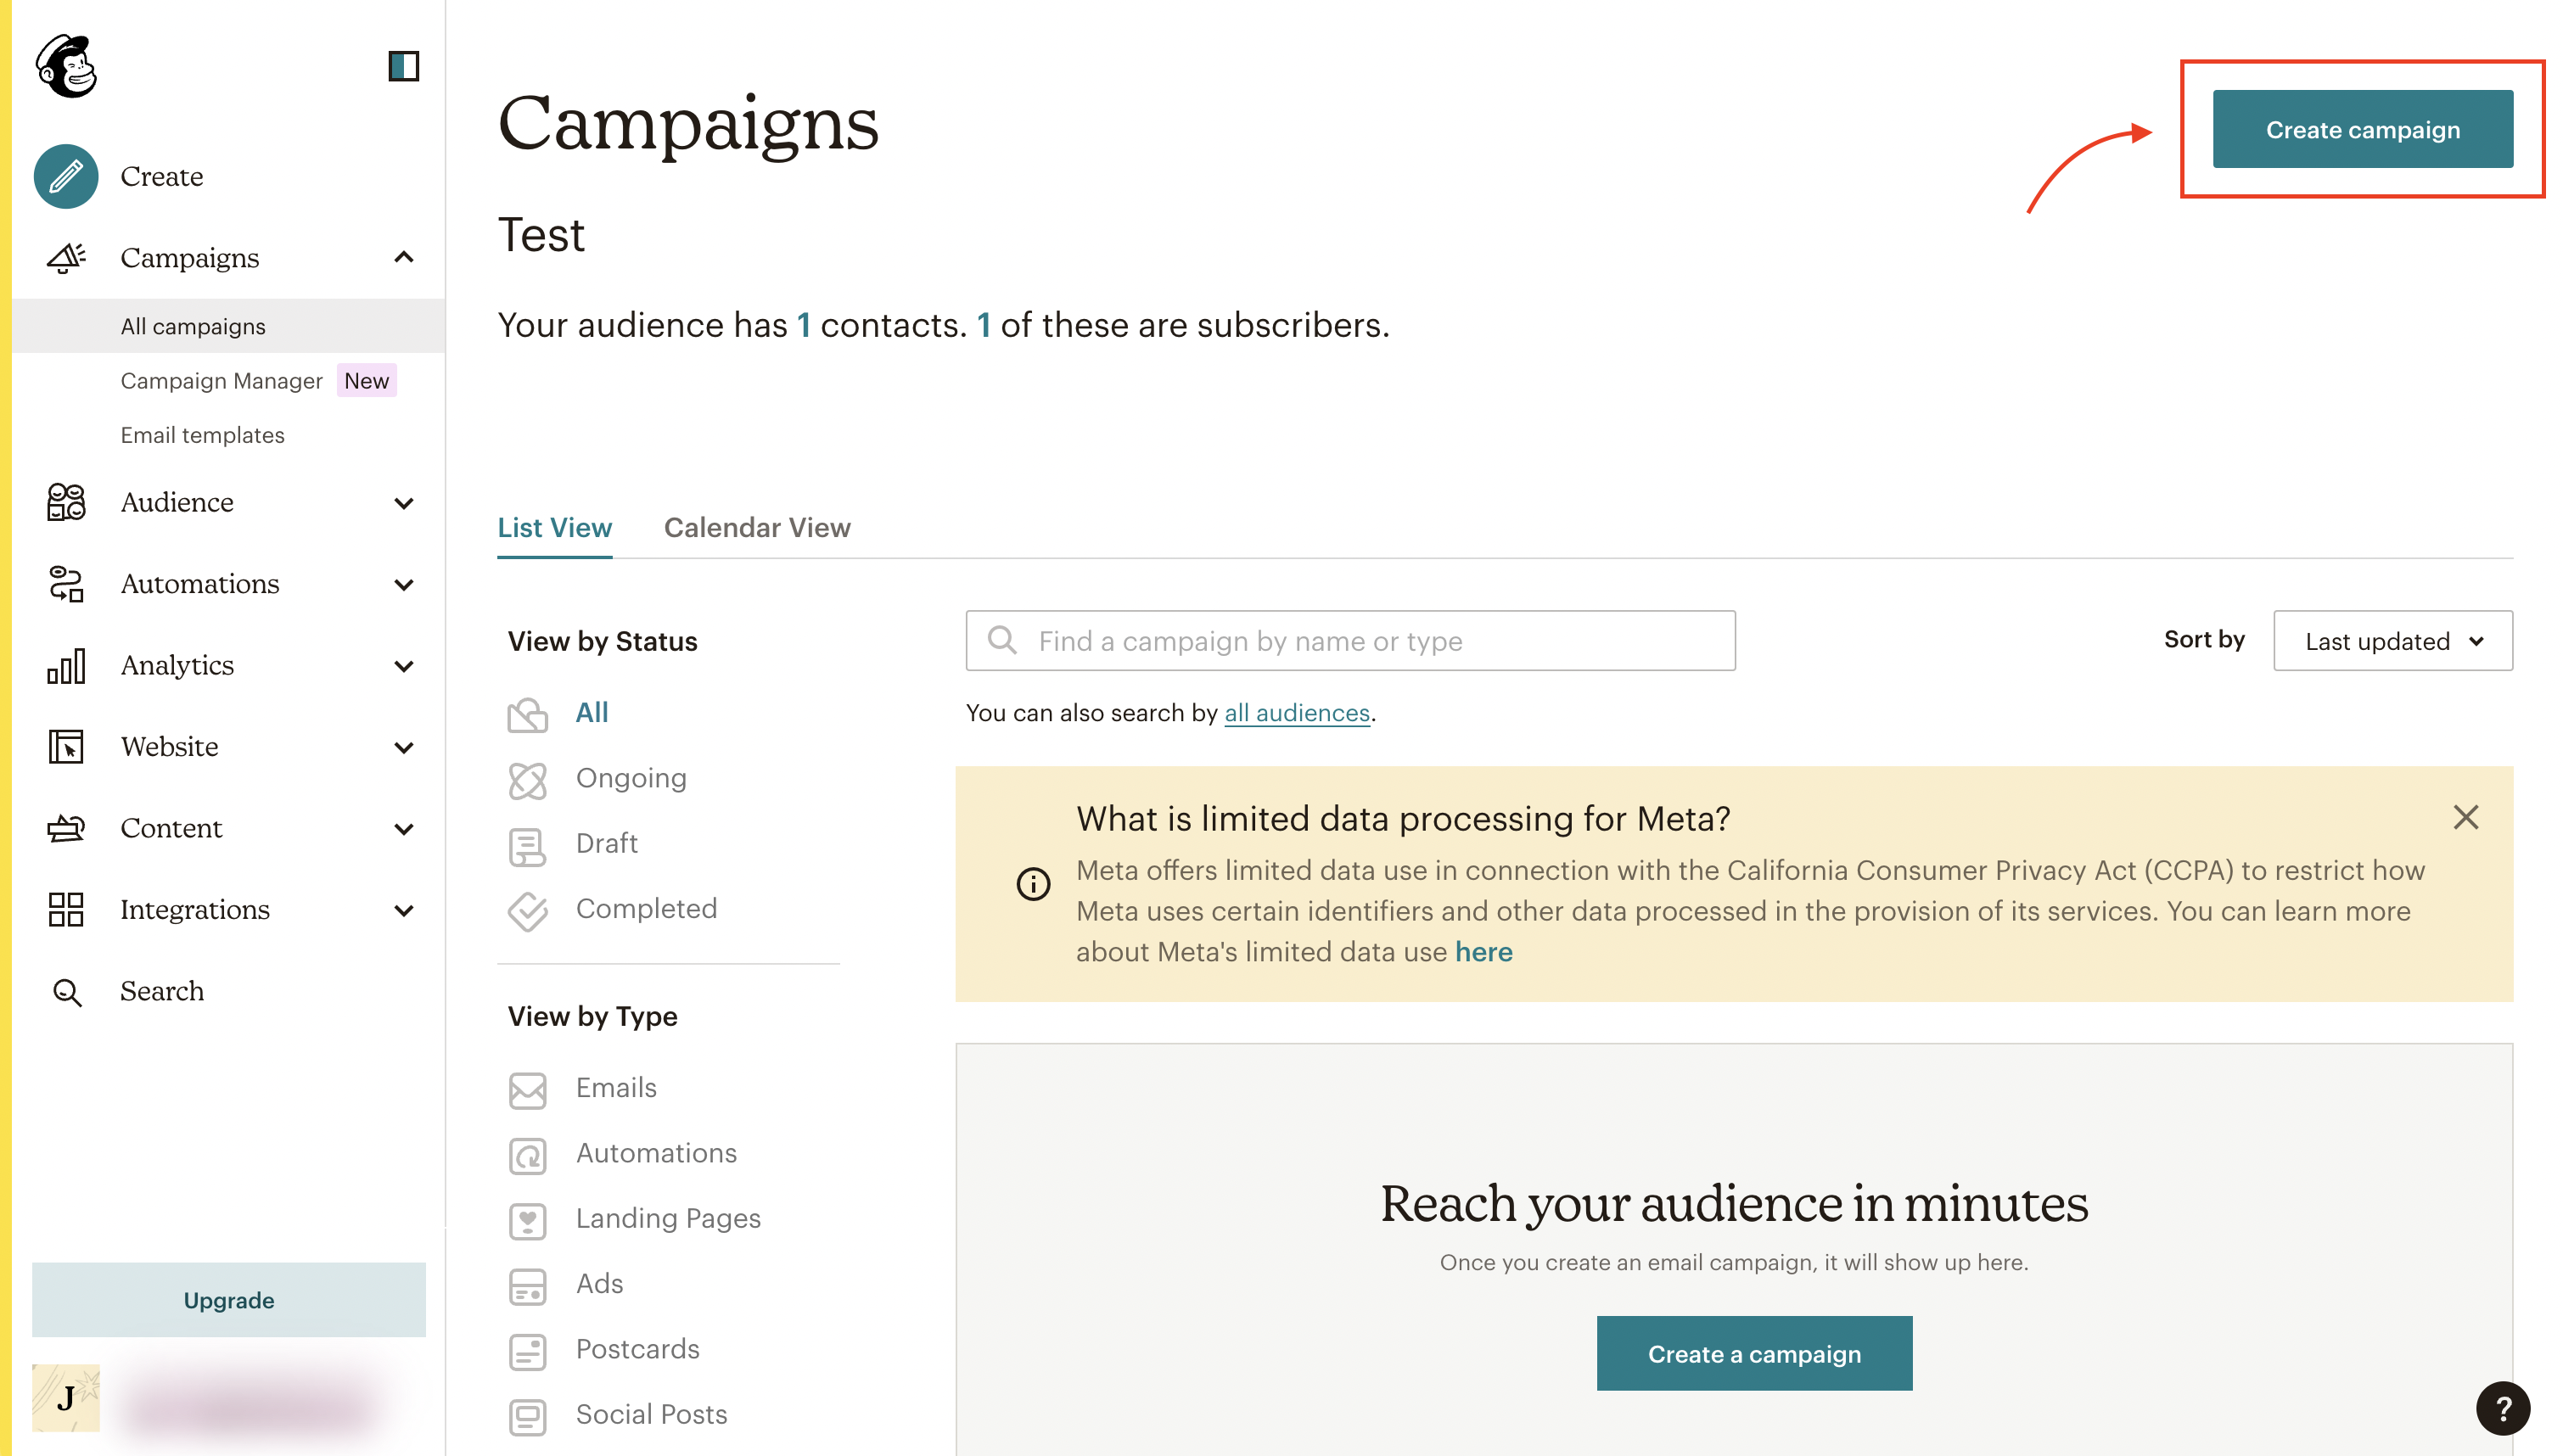
Next, log in, click on “Campaigns” in the main menu, and click on Create campaign.
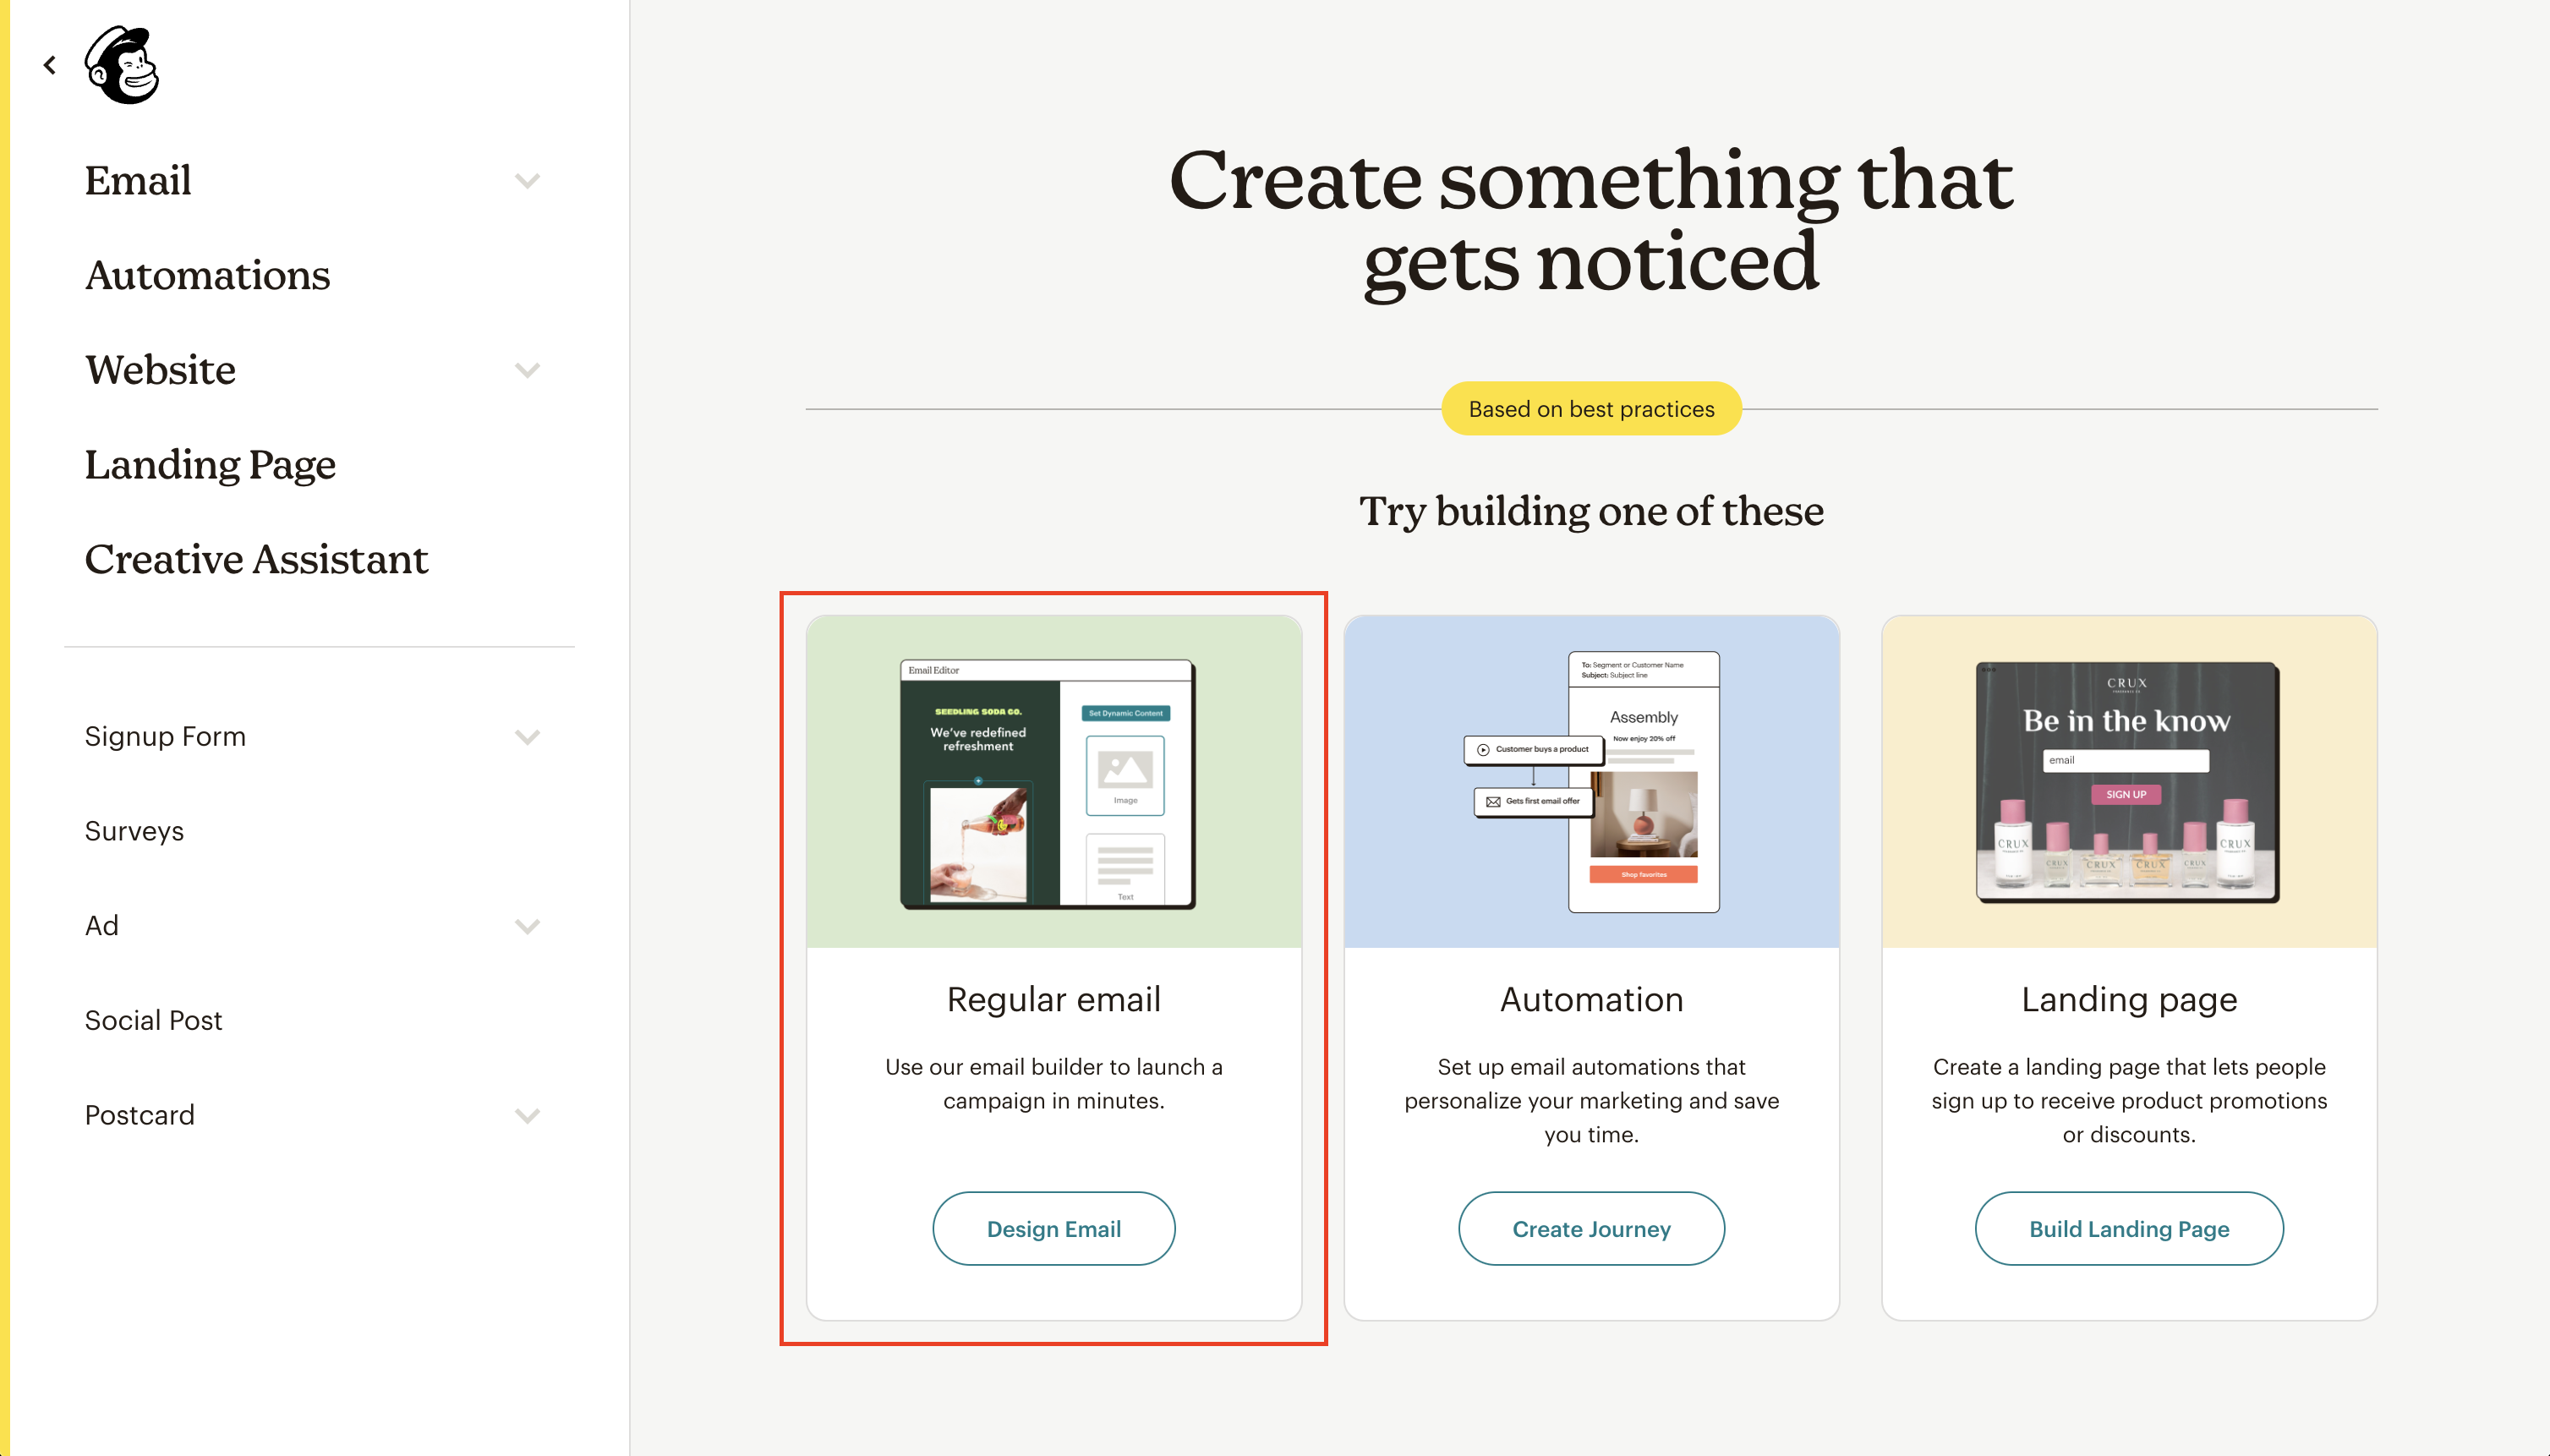
Next, you’ll need to create a campaign. Mailchimp offers several types of campaigns, including Regular email, Automation, and Landing page. For the purposes of this tutorial on how to create a newsletter in Mailchimp, we’ll focus on Regular email.
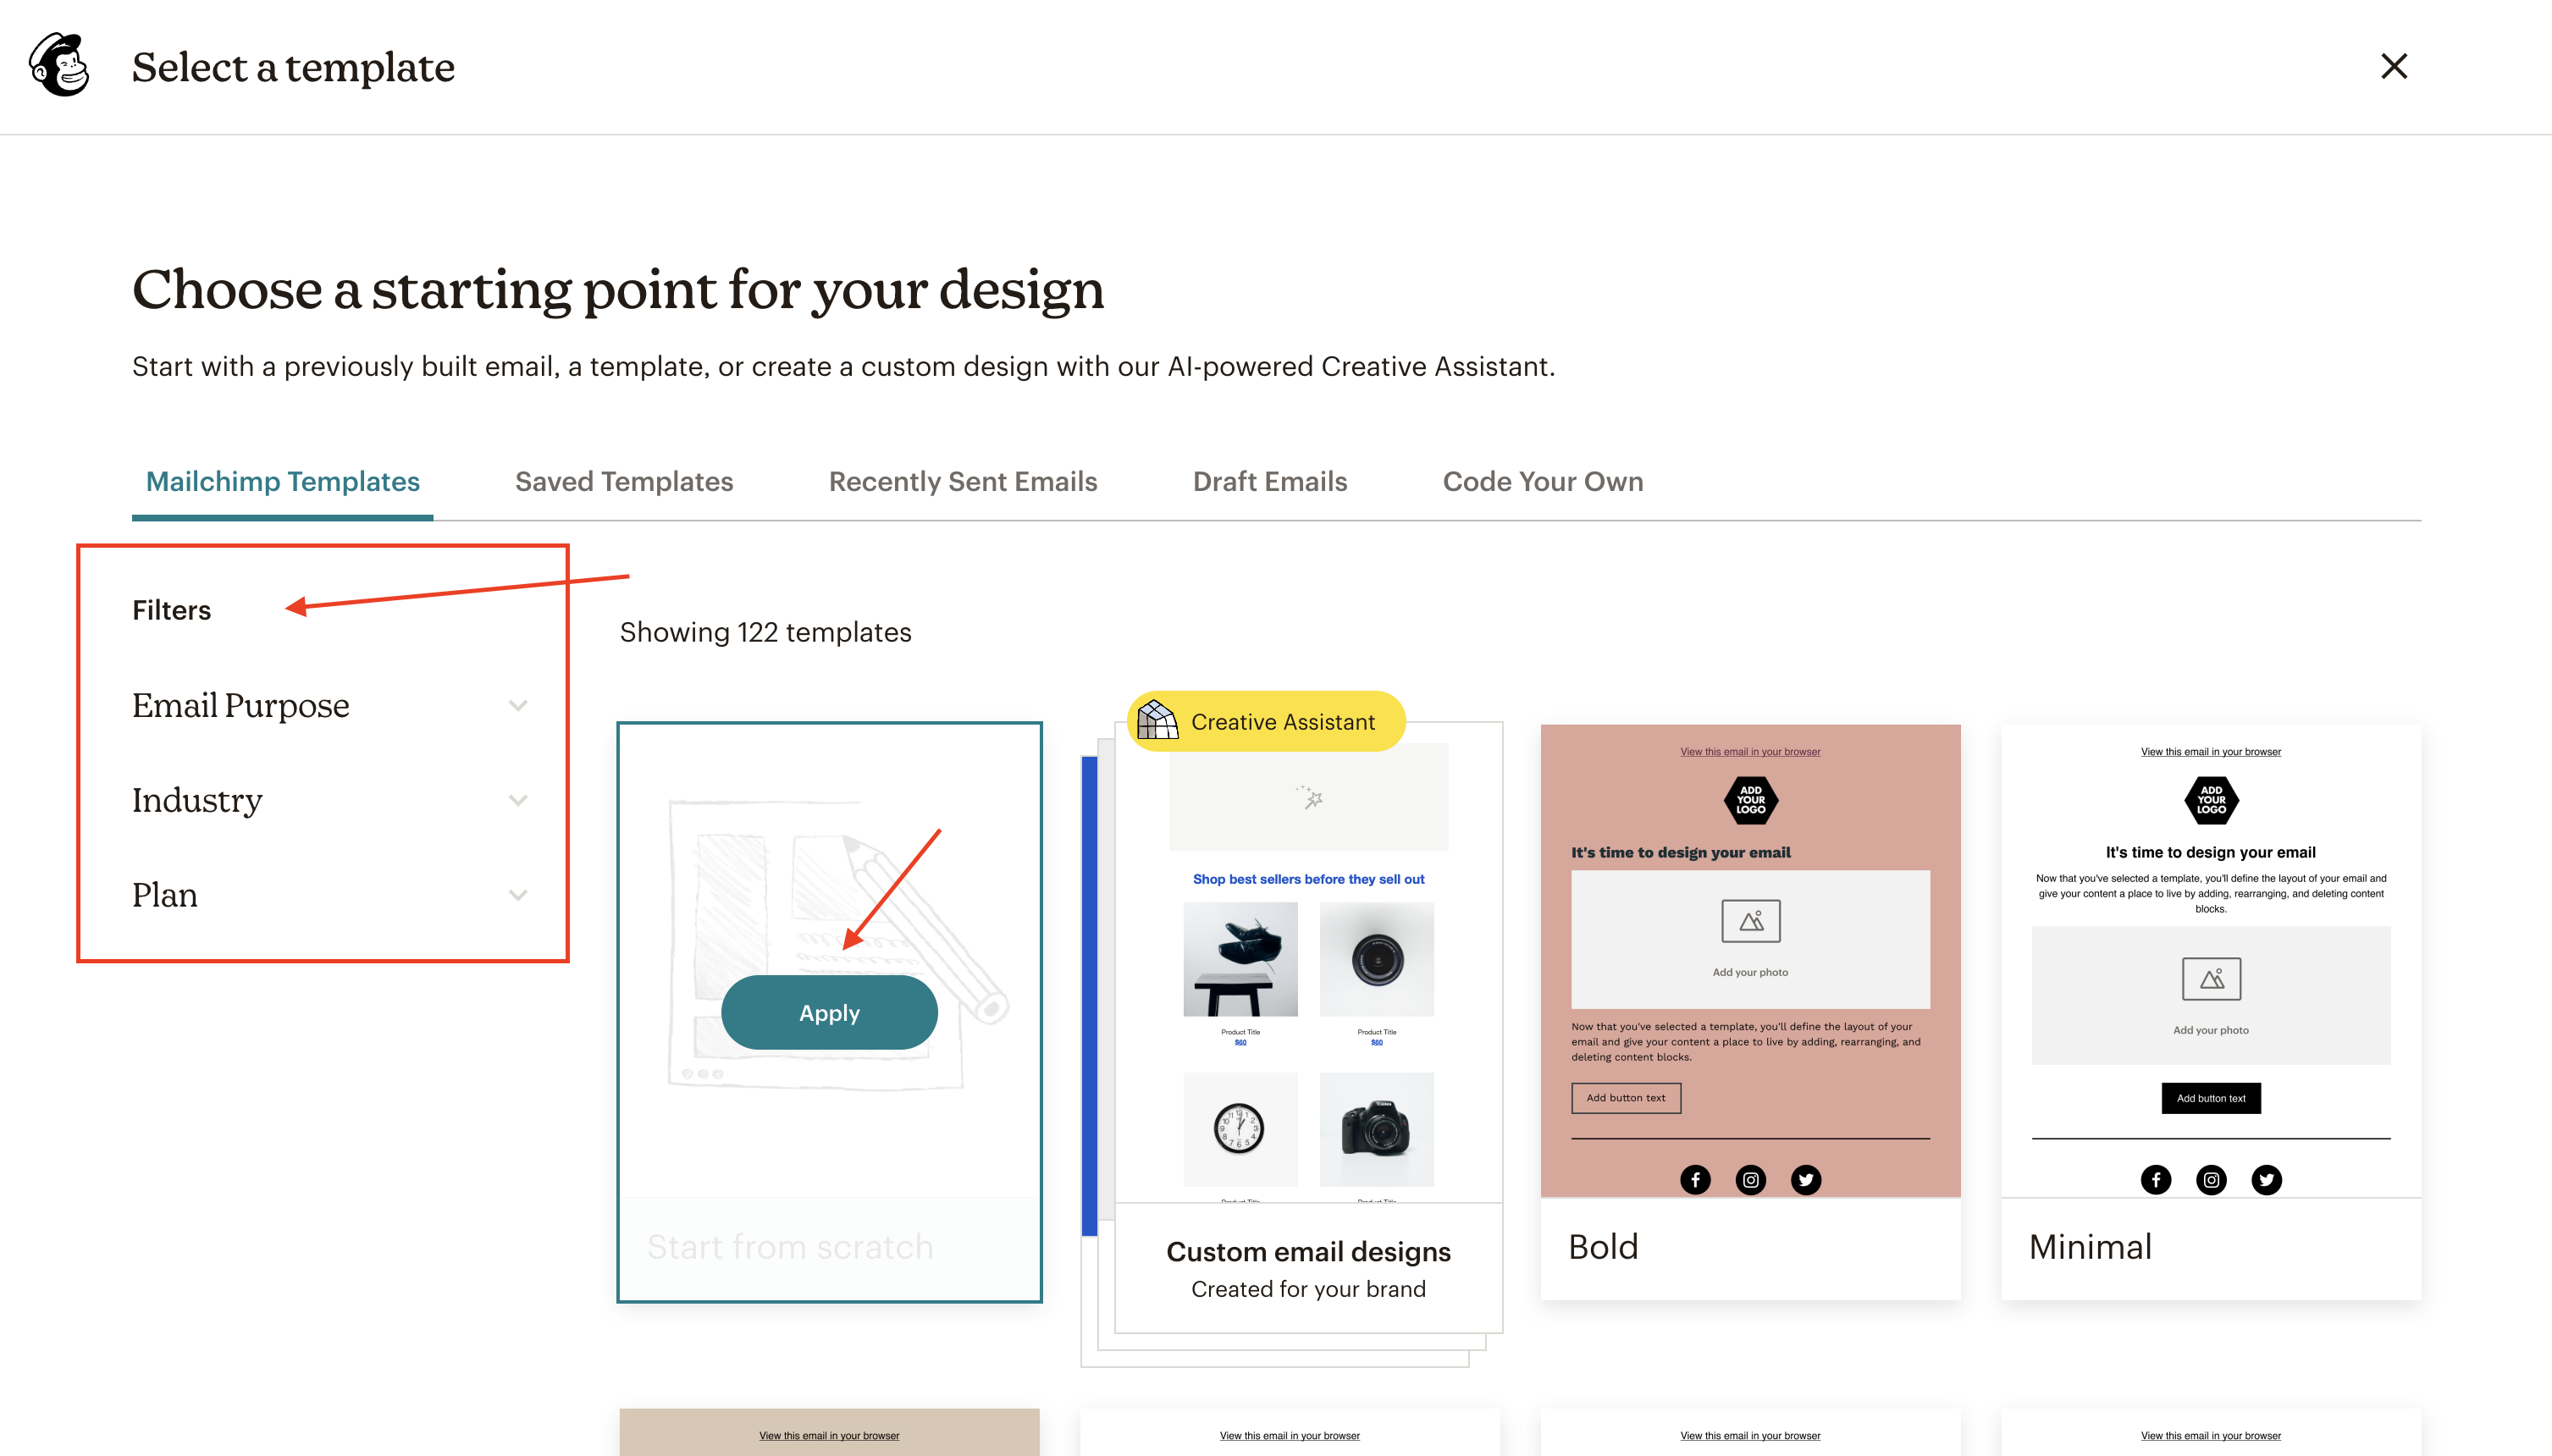
Then, you’ll need to choose a template for your newsletter and customize it to fit your brand. ⬇️
For this purpose, Mailchimp offers an extensive variety of pre-designed templates that you can filter by Email Purpose, Industry or Plan Type (free or paid).
This filter lets you pick templates based on what you want your email to do.
Example: If you’re sending out a special offer, you might choose a template designed to sell products. If you want to update your subscribers on news, you’d pick an announcement template.
This filter allows you to choose templates that best fit your type of business or job.
Example: An online shop might select a template from E-commerce & Retail, while a bakery might go for one for Food & Travel
Mailchimp offers both free and paid plans. This filter helps you find templates available in your plan.
Example: If you’re using Mailchimp without paying, you’d select the “free” option to see templates you can use without extra cost. If you’ve purchased a plan, you can explore more advanced template options in the “paid” section.
Once you’ve found the perfect template, simply click on “Apply” to begin customizing.
In this section, you will be able to completely customize your newsletter, simply dragging blocks to the campaign preview on the left side. Blocks include text, images, video, social review buttons, and also code, for more advanced users.

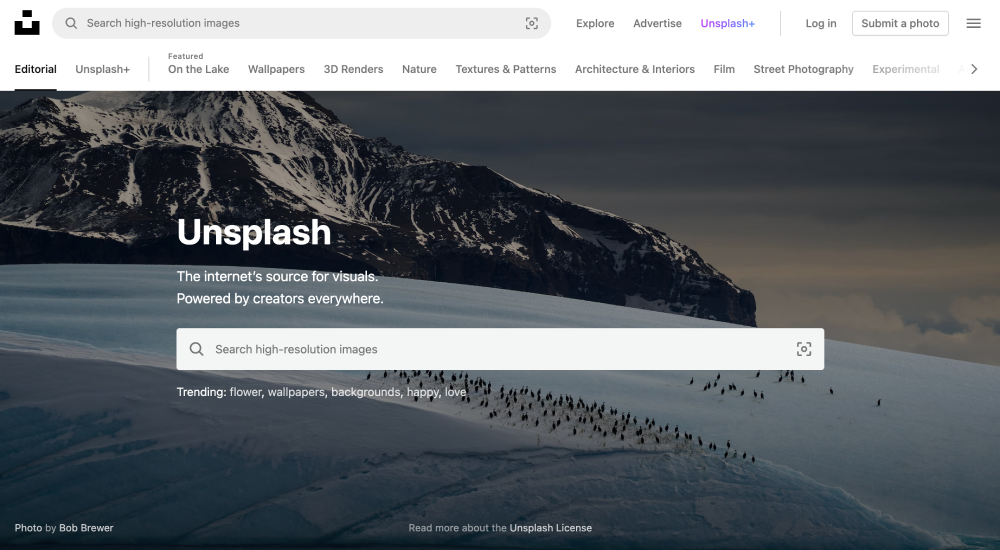
👉 Keep in mind that as millions of businesses use Mailchimp, the best option is to customize not only the text, but also the images. To do this, you can use photos from a website that offers free photography for commercial use.
An example is Unsplash or Pexels, always make sure to confirm that the licence allows you to use all photos for free.
Once you have configured the look and feel and all the information, click on “Save and exit” to be directed to where you can configure the final information, such as the subject line, the list of subscribers, who is sending the email, etc.
❗️ But before that, check some security and compliance issues that apply when sending newsletters. Don’t overlook them! ⬇️
It’s important to keep in mind that Mailchimp requires you to comply with all applicable laws, as stated in Section 20 of their Terms of Use, that you must be compliant with all applicable laws. This typically means that you need to adhere to your country’s privacy laws, as well as those of your subscribers.
Let’s take a look at the legal requirements below:
Under most countries’ laws, you’re required to have a valid privacy policy in place. The privacy policy should include accurate and clearly stated details of who is doing the processing and for what purpose. Not doing so can often result in major fines and sanctions.
Informed Consent
If you fall under the scope of laws such as the GDPR and even Canada’s PIPA, in order to be considered as valid, the consent you collect must meet specific requirements including that of fully and correctly informing your users’ of the purposes, methods, and parties involved in the processing of their data.
If you fall within the scope of the GDPR (and you likely do), it’s mandatory that you keep valid records of consent. These records should include:
Under the FTC’s CAN-SPAM Act, you do not need consent prior to adding users located in the US to your mailing list or sending them commercial messages, however, it is mandatory that you provide users with a clear means of opting out of further contact.
Once you’ve customized both the text and images and the legal requirements, we’re ready to proceed to the next step: checking that all elements of the newsletter are complete before scheduling it to be sent.
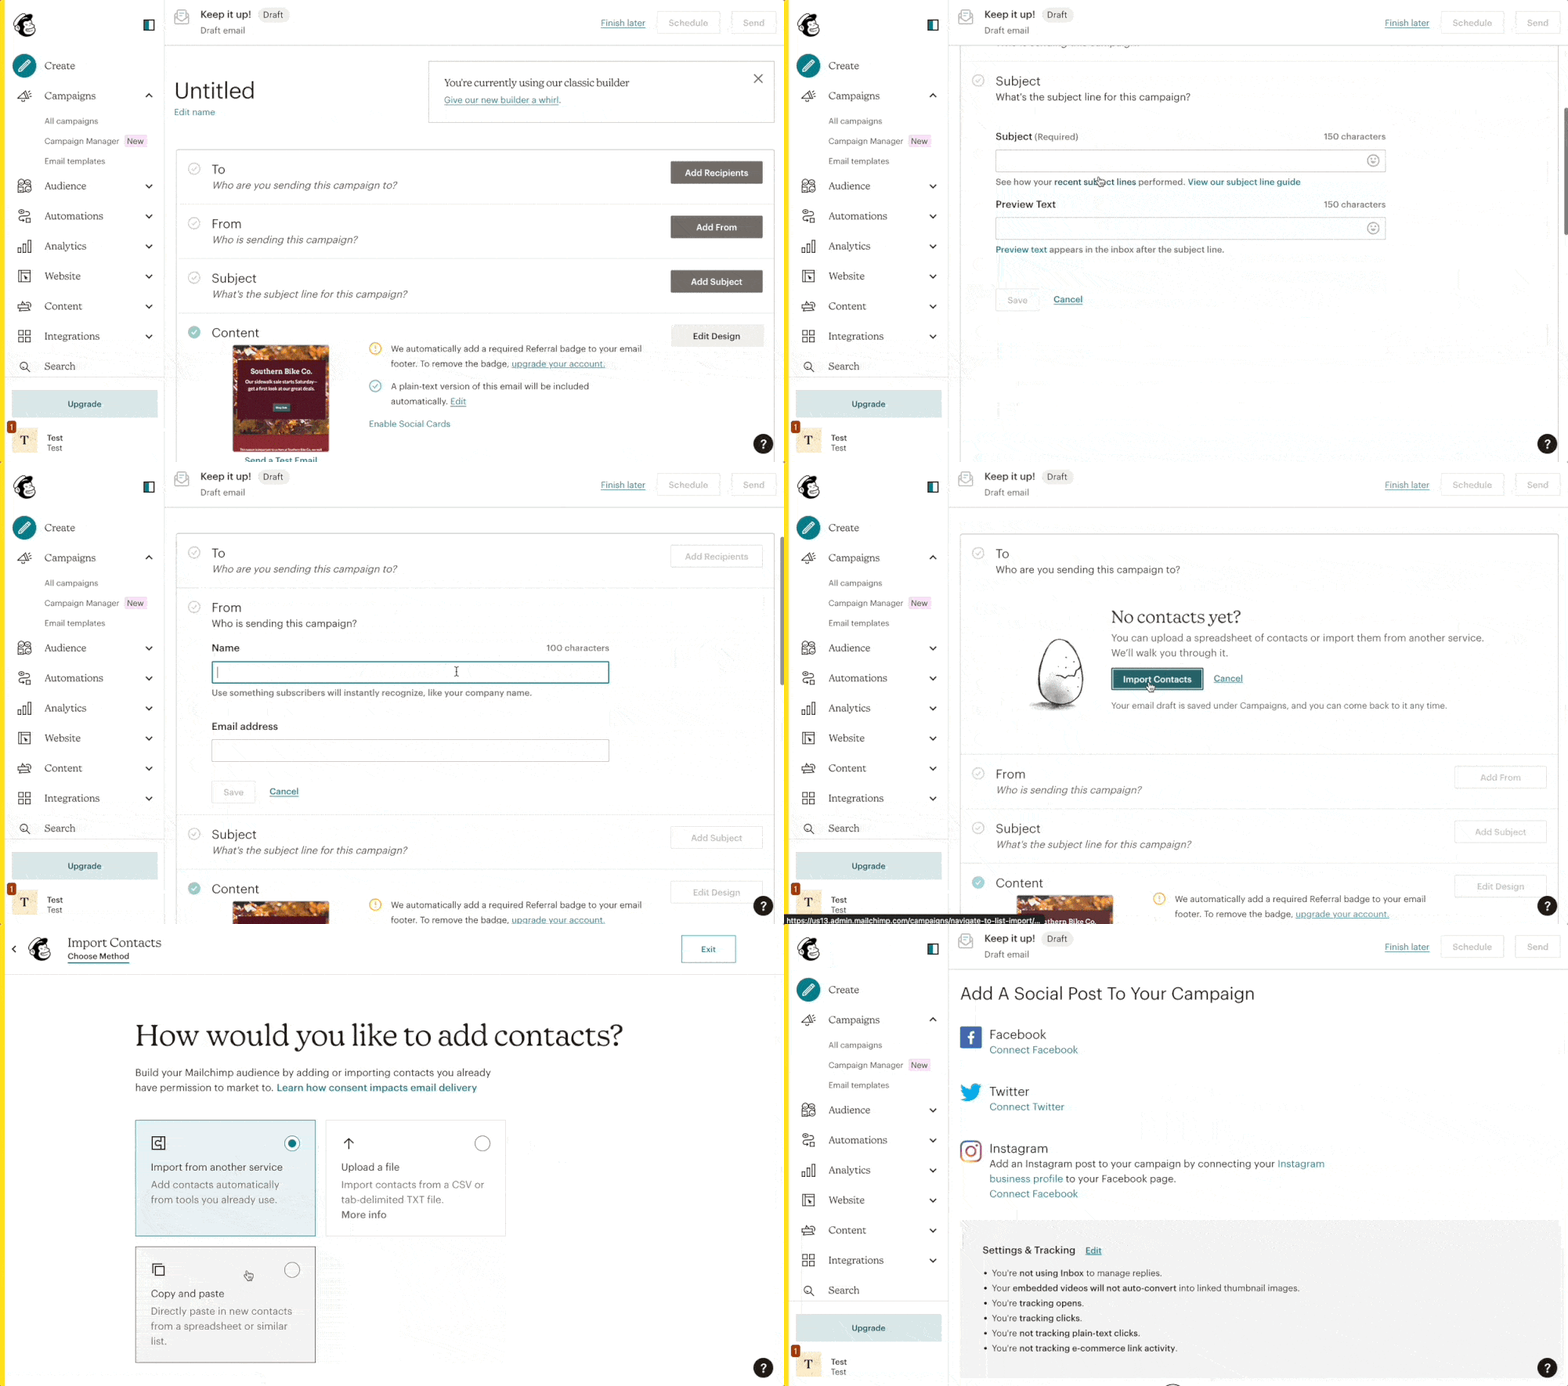
Mailchimp presents us with a summary of important information about our campaign, including:
Try our Newsletter Opt-in Booster 👉 it adds a customizable signup form to your site, allowing you to collect and manage consent through a double opt-in process for a more engaged and responsive audience.
Activate nowRegarding what time of day is historically linked to better email campaign success, several studies have been performed, so don’t forget to consider this point to decide when might be the best time to send your newsletter.
And you’re ready to go! Once you schedule your newsletter, it will be sent to your subscriber list, on the day and time specified.
This is a common question many people have when considering using the platform for their newsletter campaigns. The answer is, yes and no. Mailchimp does offer a free plan, which includes basic features and allows you to send up to 10,000 emails per month to up to 2,000 subscribers. This is a great option, however, there are some limitations to the free plan, such as the lack of advanced reporting features and the inability to automate campaigns. There are also plenty of alternative free email marketing tools that provide similar or even more features than MailChimp that you could consider for your newsletter.
If you require more advanced features, Mailchimp offers several paid plans starting at $9.99 per month, which allow for increased customization, automation, and reporting capabilities. The specific plan you choose will depend on the size of your email list and your marketing objectives.
In regard to compliance, it is always a good idea that you approach your data processing activities with the strictest applicable regulations in mind.
It’s easier than you think. There are three main steps:
Do you make this one mistake when sending marketing emails?
👉 Check here