Once you’ve integrated the privacy policy on your website made in Webflow (which also includes the cookie policy if you’ve activated it) you can complete the configuration by embedding our cookie management solution to [1] display a fully customizable cookie banner, [2] collect cookie consent and [3] implement prior blocking, as required by the Cookie Law.
To install the Privacy Controls and Cookie Solution you’ll need to modify the HEAD of your site, a Webflow premium feature available only on their paid plans. More info on the Webflow University.
First, go to your iubenda Dashboard and click on [Your website] > Privacy and Cookie Policy > Edit. You’ll notice a Cookie Policy box in the right column.

Click on Activate cookie policy and Save changes: your cookie policy will be generated automatically based on the configuration of your privacy policy.
The Privacy Controls and Cookie Solution requires that you link to a cookie policy from you banner as legally required. If you have the cookie policy feature activated on your iubenda account, the Privacy Controls and Cookie Solution automatically integrates your cookie policy into the solution once the option is selected.
If you already have your own cookie policy, you can add the link in the advanced view of the Privacy Controls and Cookie Solution configurator (see below). Simply select Custom under Cookie Policy > Cookie Policy URL. More info on the Privacy Controls and Cookie Solution advanced guide.
Click on Generate now under Dashboard > [Your website/app] > Privacy Controls and Cookie Solution.

This will take you directly to the configuration panel of your cookie banner.

Once customized as you like, Save and Copy your Privacy Controls and Cookie Solution snippet.

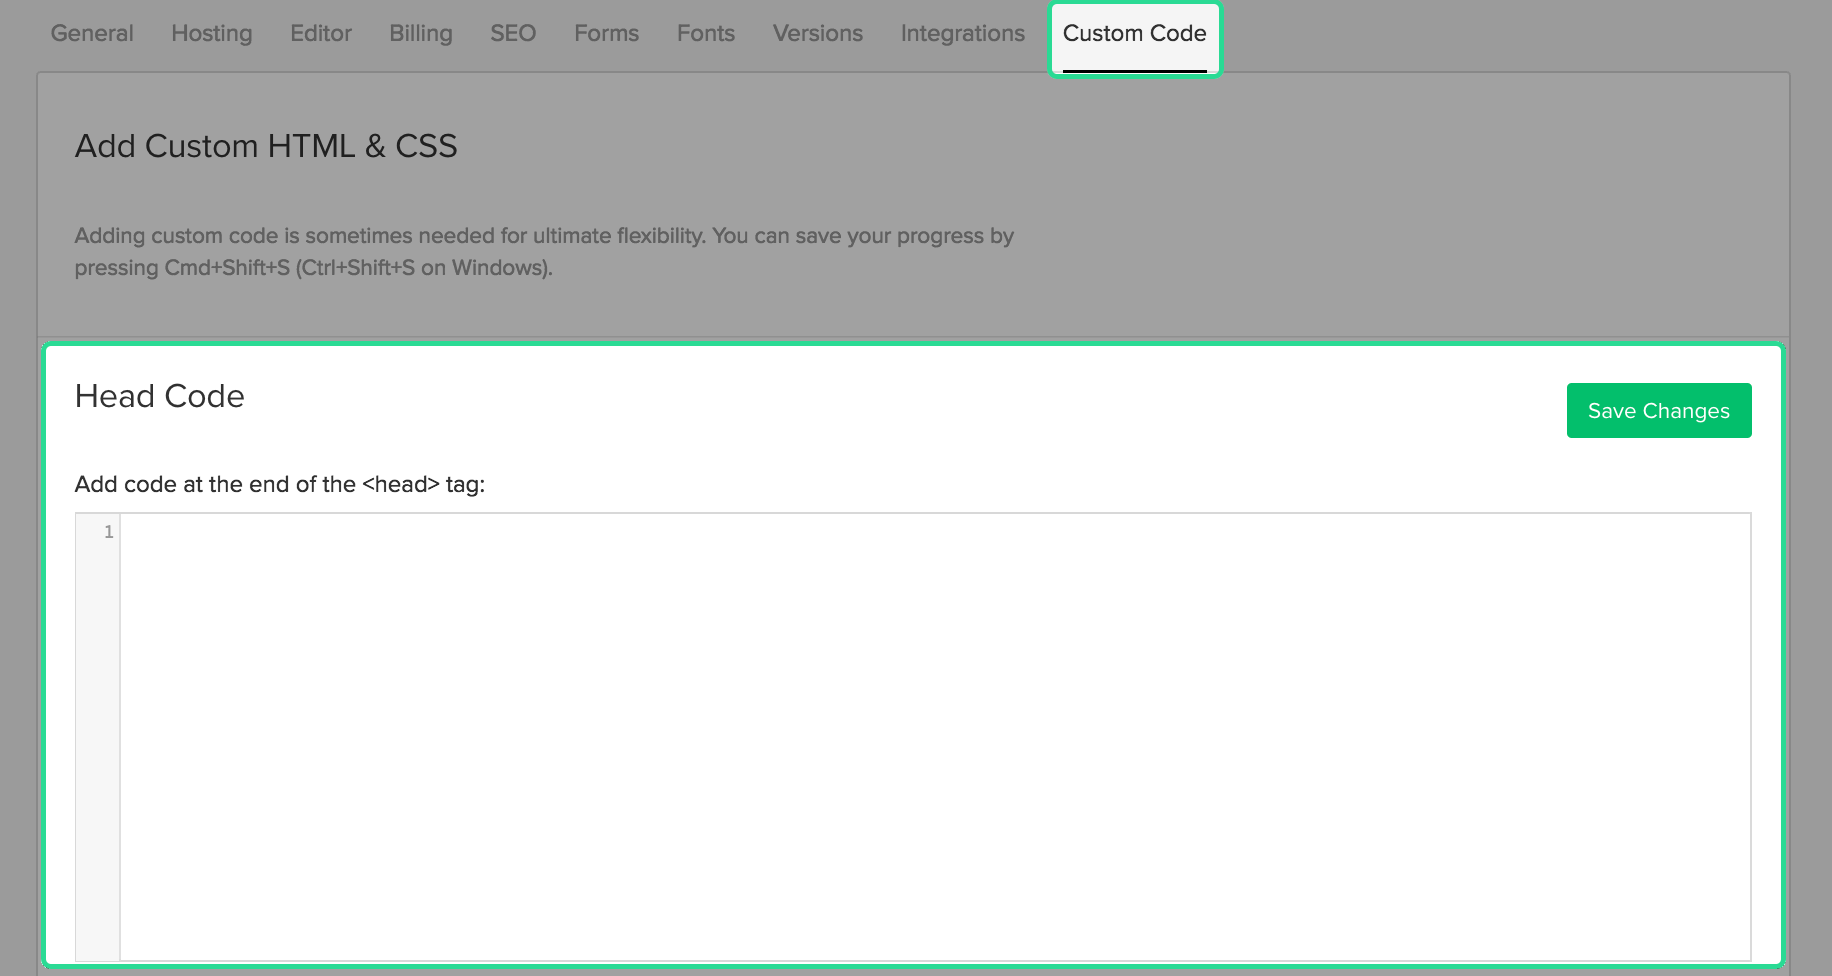
Now go to your Webflow dashboard and select your project’s Settings.

Click on the Custom Code tab.

Paste your Privacy Controls and Cookie Solution code snippet in the Head Code section and click on Save Changes.

Publish and you’re done.

Few categories of cookies are exempt from the consent requirement. Therefore, almost all scripts that install or can install cookies must be preemptively blocked before consent is obtained.
Did you know that there’s a simpler option available for the prior blocking of cookies and trackers? Our auto-blocking feature automates the process, saving you time and effort.
If you prefer to manually tag your scripts that install or may install cookies, you can see our guide on blocking via manual tagging or explore other methods outlined in our general introduction to the prior blocking of cookies. However, we highly recommend considering the auto-blocking feature for a more streamlined approach.
👉 Click here to learn more about auto-blocking and how it can simplify your cookie-blocking process